Do you want to customise the actions when a document in Microsoft 365 reaches the end of its retention period? Purview has an option to run a Power Automate workflow at the end of the retention period, but there are a few things you need to know.
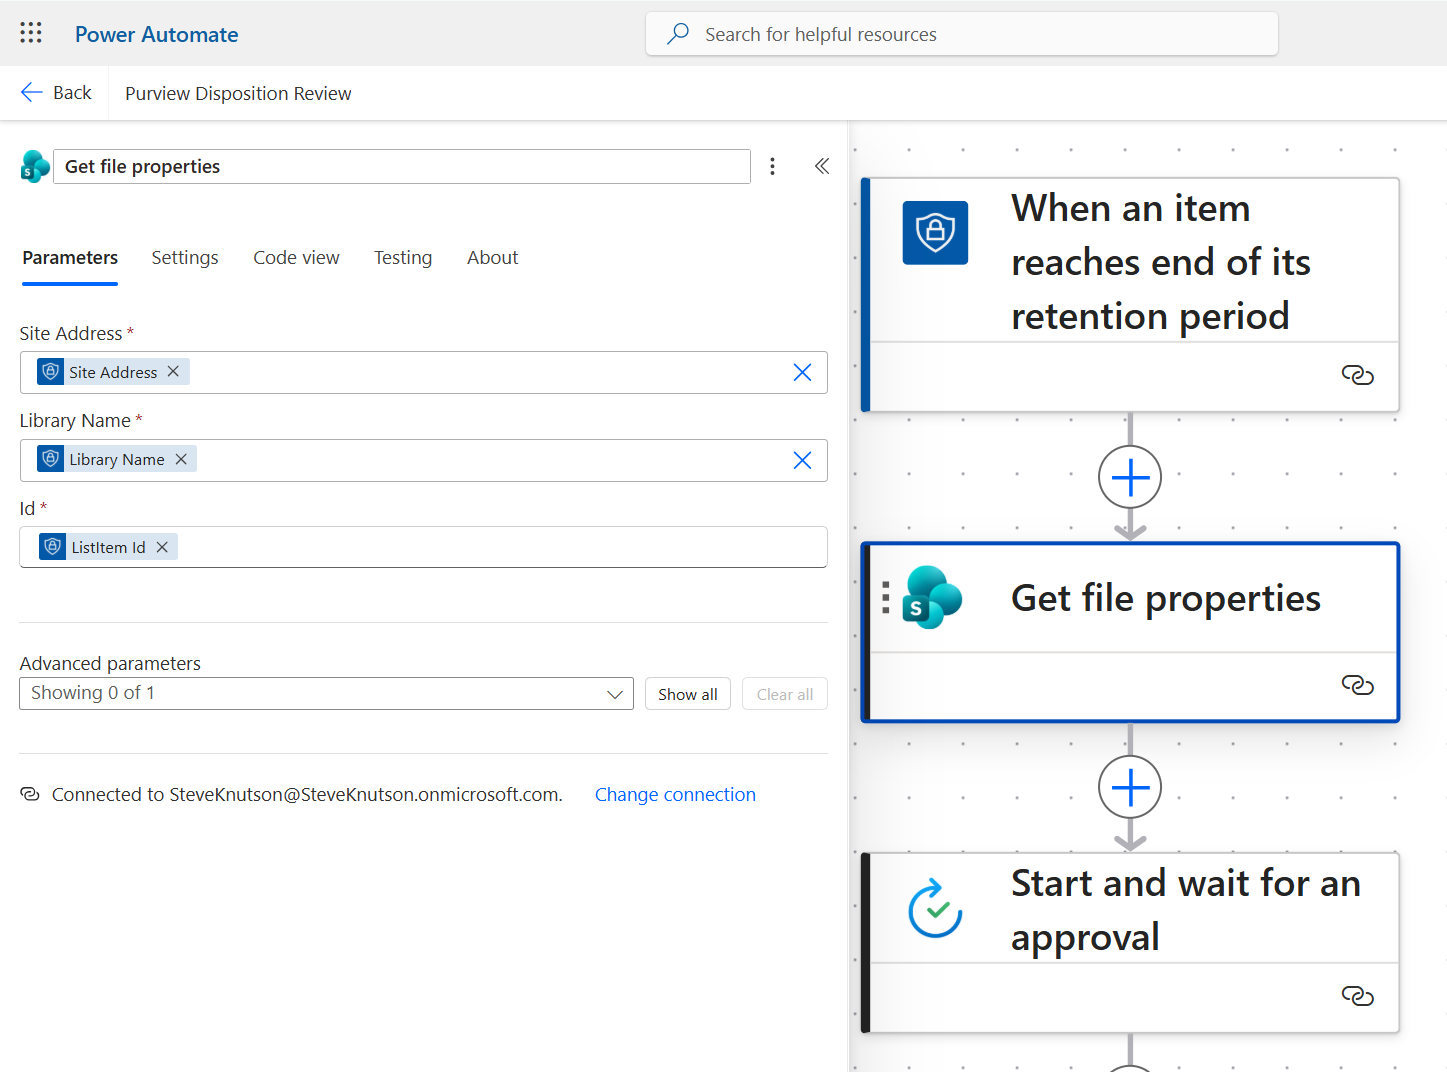
Start by creating an “Instant Cloud Flow” in Power Automate using the “When an item reaches end of its retention period” as the trigger. Next add a “Get File Properties” action using the input from the trigger for the Site Address, Library Name and Item ID.
Because we are using Dynamic content for the parameters on the “Get File Properties” action, Power Automate doesn’t show the properties for subsequent actions. To work around this, you can use an expression. In this screenshot I am using the expression to get the name of the document, you can replace {Name} with other metadata values. This is useful if you want to get metadata from the document e.g. for classifying the document or identifying who should approve the next action.
@{outputs('Get_file_properties')?['body/{Name}']}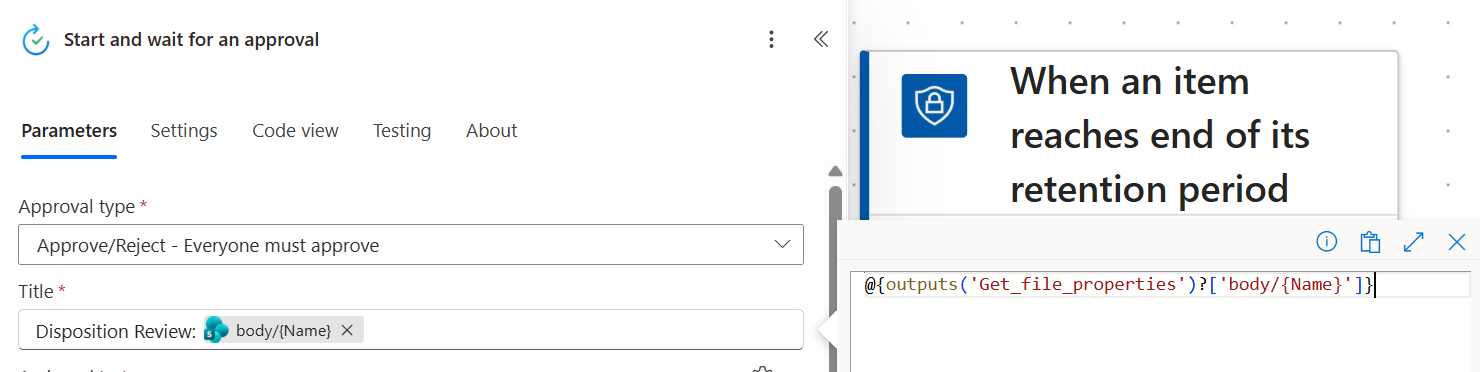
The approval step sends a notification with document properties to the reviewer asking them to decide what to do with this document.

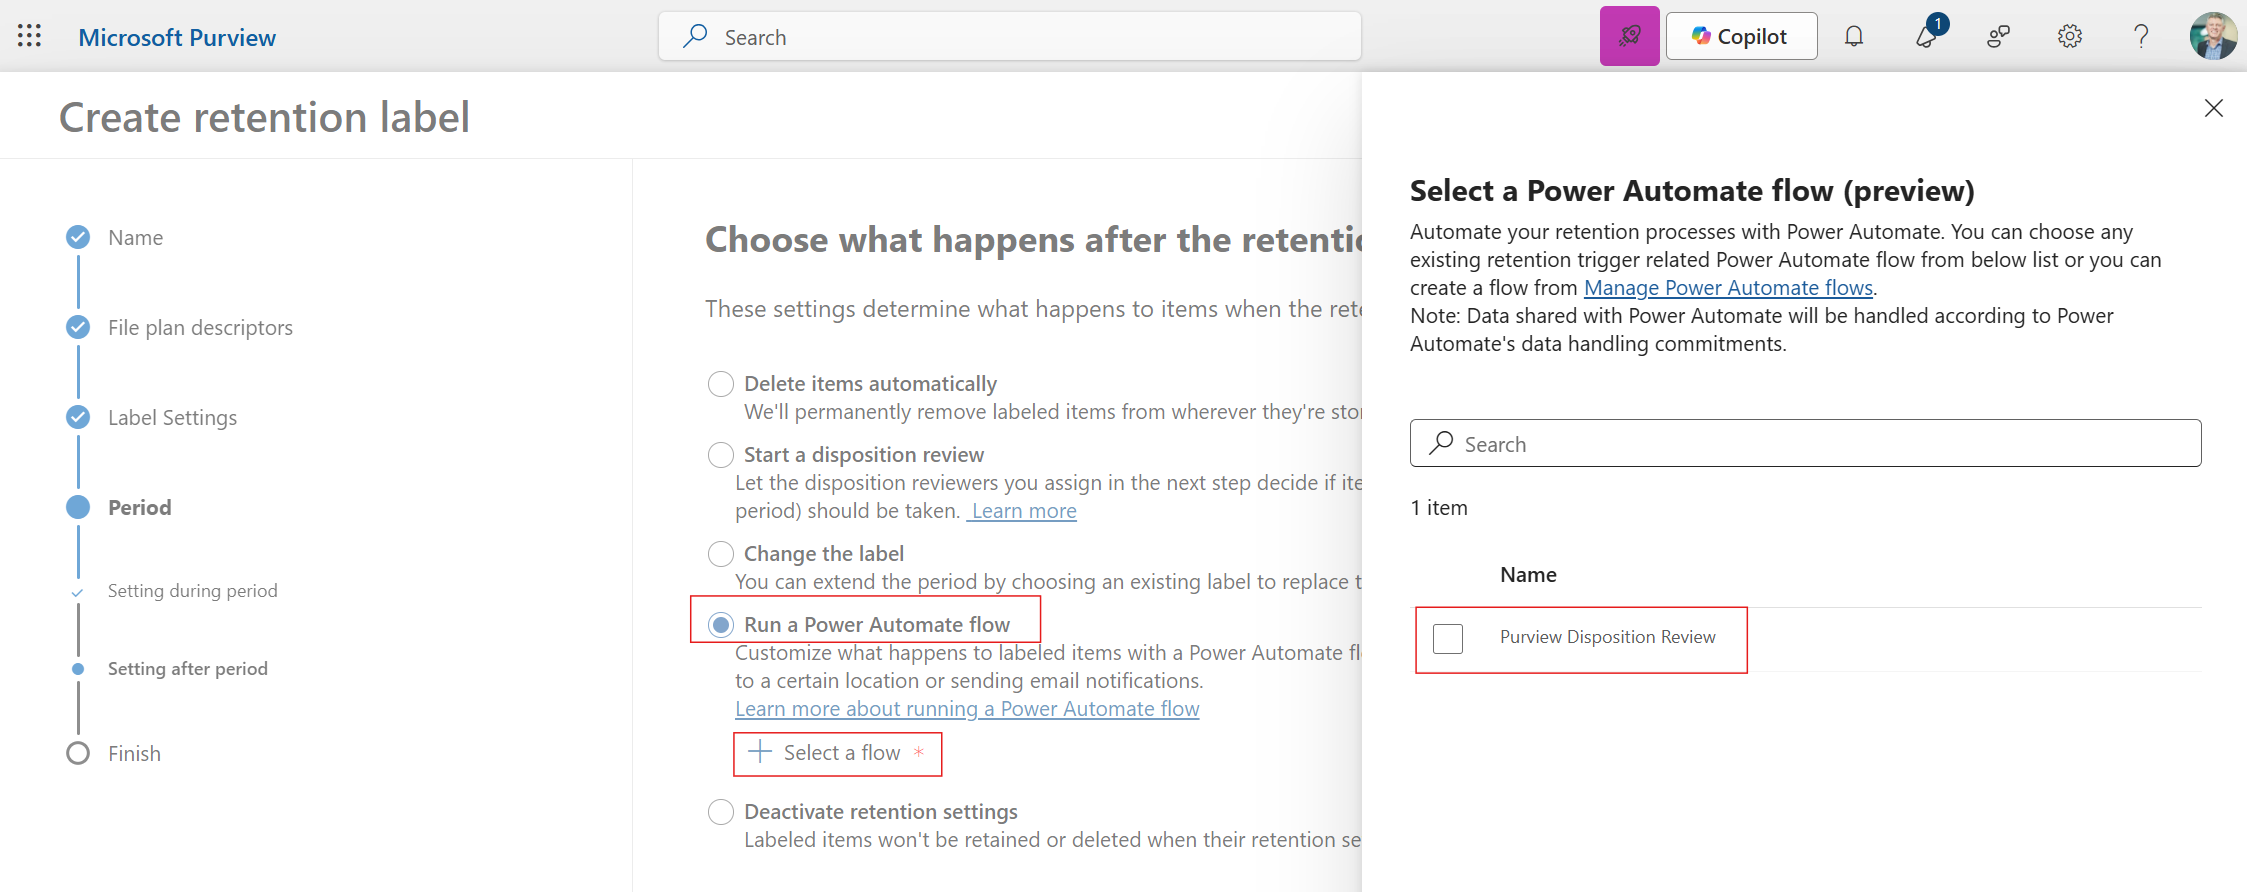
To connect the Flow to a Retention Label, create a Retention Label (in the Purview Records Management, File Plan page). In the “settings after period”, choose the “Run a Power Automate Flow” option and select your Flow. It is a good idea to set the retention period to 1 day initially. It can still take up to 14 days for the Label to become active and trigger the Flow for testing. Patience is a virtue when it comes to Purview!
Helpful PowerShell
While it isn’t possible to include an end of retention workflow when bulk creating Retention Labels via an import Excel file, you can use PowerShell to apply an existing Label, using the following Set-ComplianceTag cmdlet. Get the Flow ID from its URL in Power Automate (the second GUID value in the URL).
Connect-IPPSSession

#Get a List of existing Retention Labels
Get-ComplianceTag | Format-Table Name, RetentionAction, AgeLimitForRetention, Description -AutoSize

#Update an existing label - replace the Label Name and Flow ID with yours
Set-ComplianceTag -Identity "Label Name" -FlowID dc1234b5-000a-1aaa-aaa1-b111aa1a11da
You can also create Retention Label directly from PowerShell, assigning the Flow using the -FlowID parameter on the New-ComplianceTag cmdlet.
New-ComplianceTag -Name "Label Name"-RetentionType TaggedAgeInDays -RetentionDuration 1 -RetentionAction Keep -Notes “Created from PowerShell” -IsRecordLabel $false -FlowID dc1234b5-000a-1aaa-aaa1-b111aa1a11daWhy do it?
The benefit of using a workflow at the end of the retention process include:
- Ability to customise the review steps
- Ability to capture additional log data for the disposal process
- Ability to have business rules that automate an action such as relabelling
- Ability to trigger a process in an external system via an API
There are a few requirements and limitations to be aware of:
- Purview actions require premium licensing for Power Automate
- Power Automate Solutions are not currently supported
- The Flow must be in the default environment
- The Flow must be shared with the person creating the Retention Label
So if you need to customise the end of your document lifecycle, this might be the right solution for you.
Discover more from SharePoint Moments
Subscribe to get the latest posts sent to your email.
